-1.png?height=120&name=ShareBuilders%20Logo%20(07052023)-1.png)
Getting started with Pending - How to add a pending.
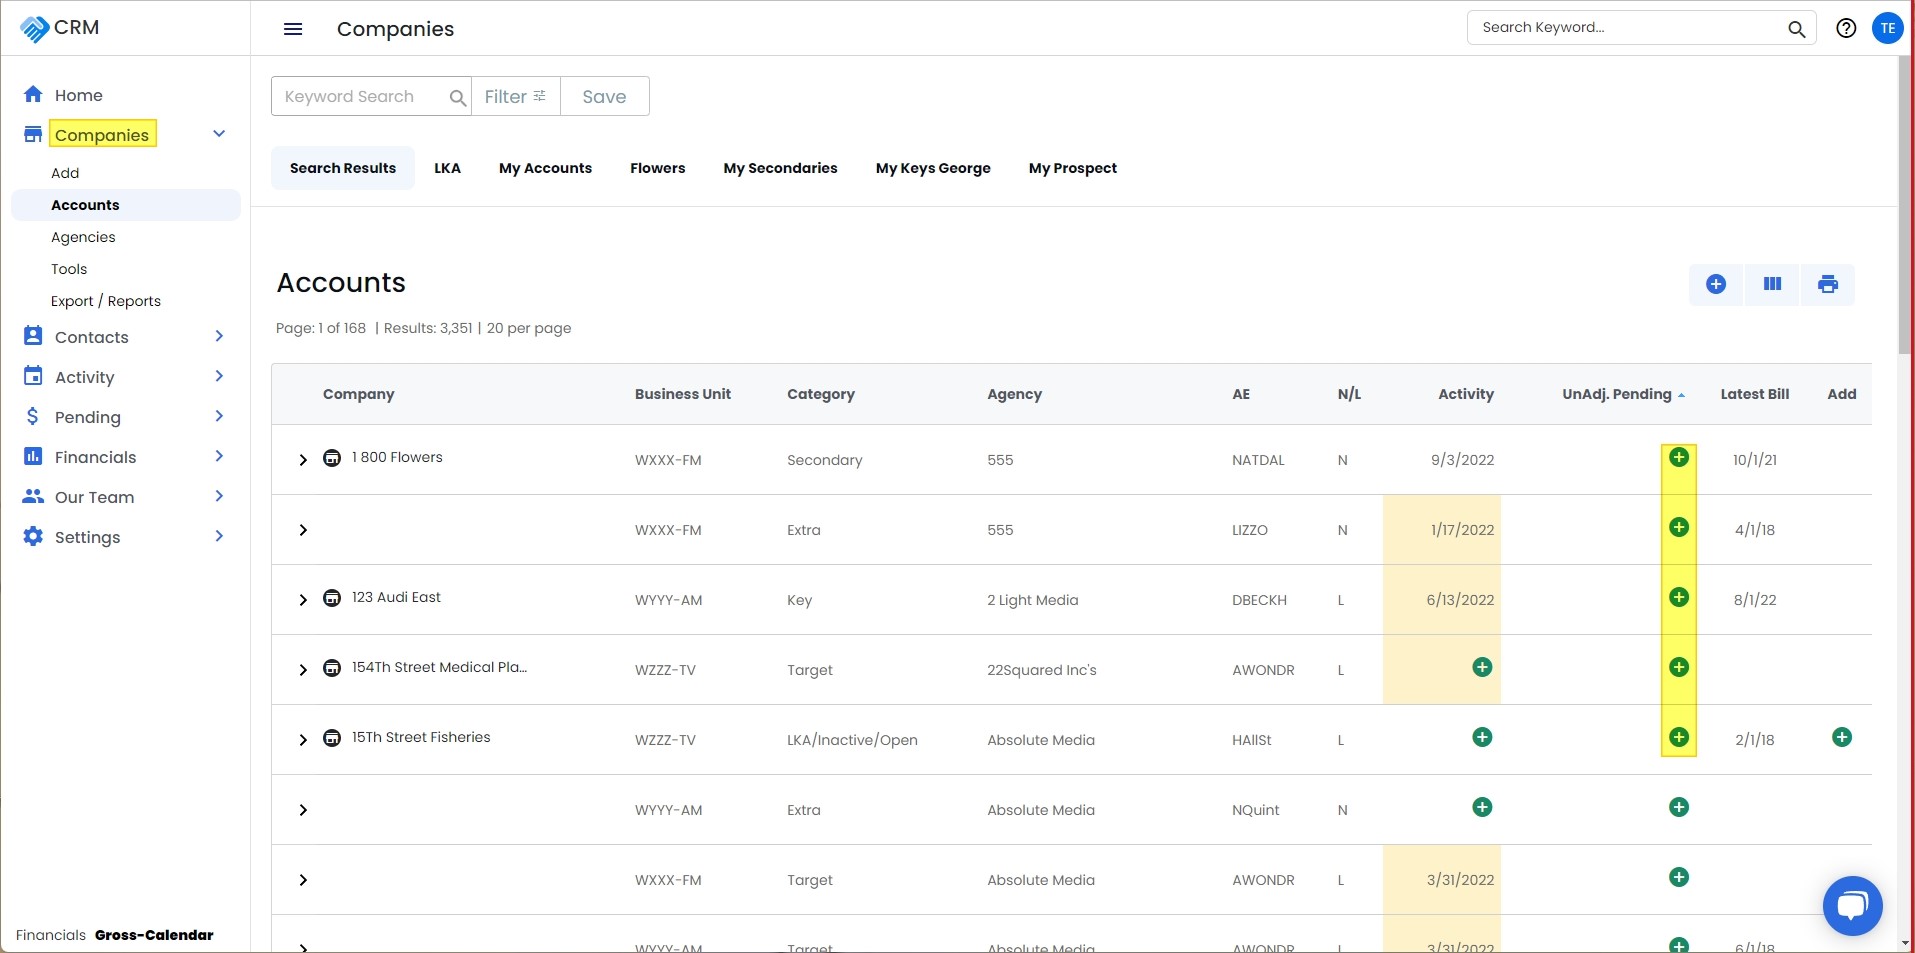
Start your pending's from your account list!
A new pending should preferably be entered from the Account Page (but you can add from the left Navigation Bar under PENDING>ADD)
Click on the + sign in the unadjusted pending column for the account.
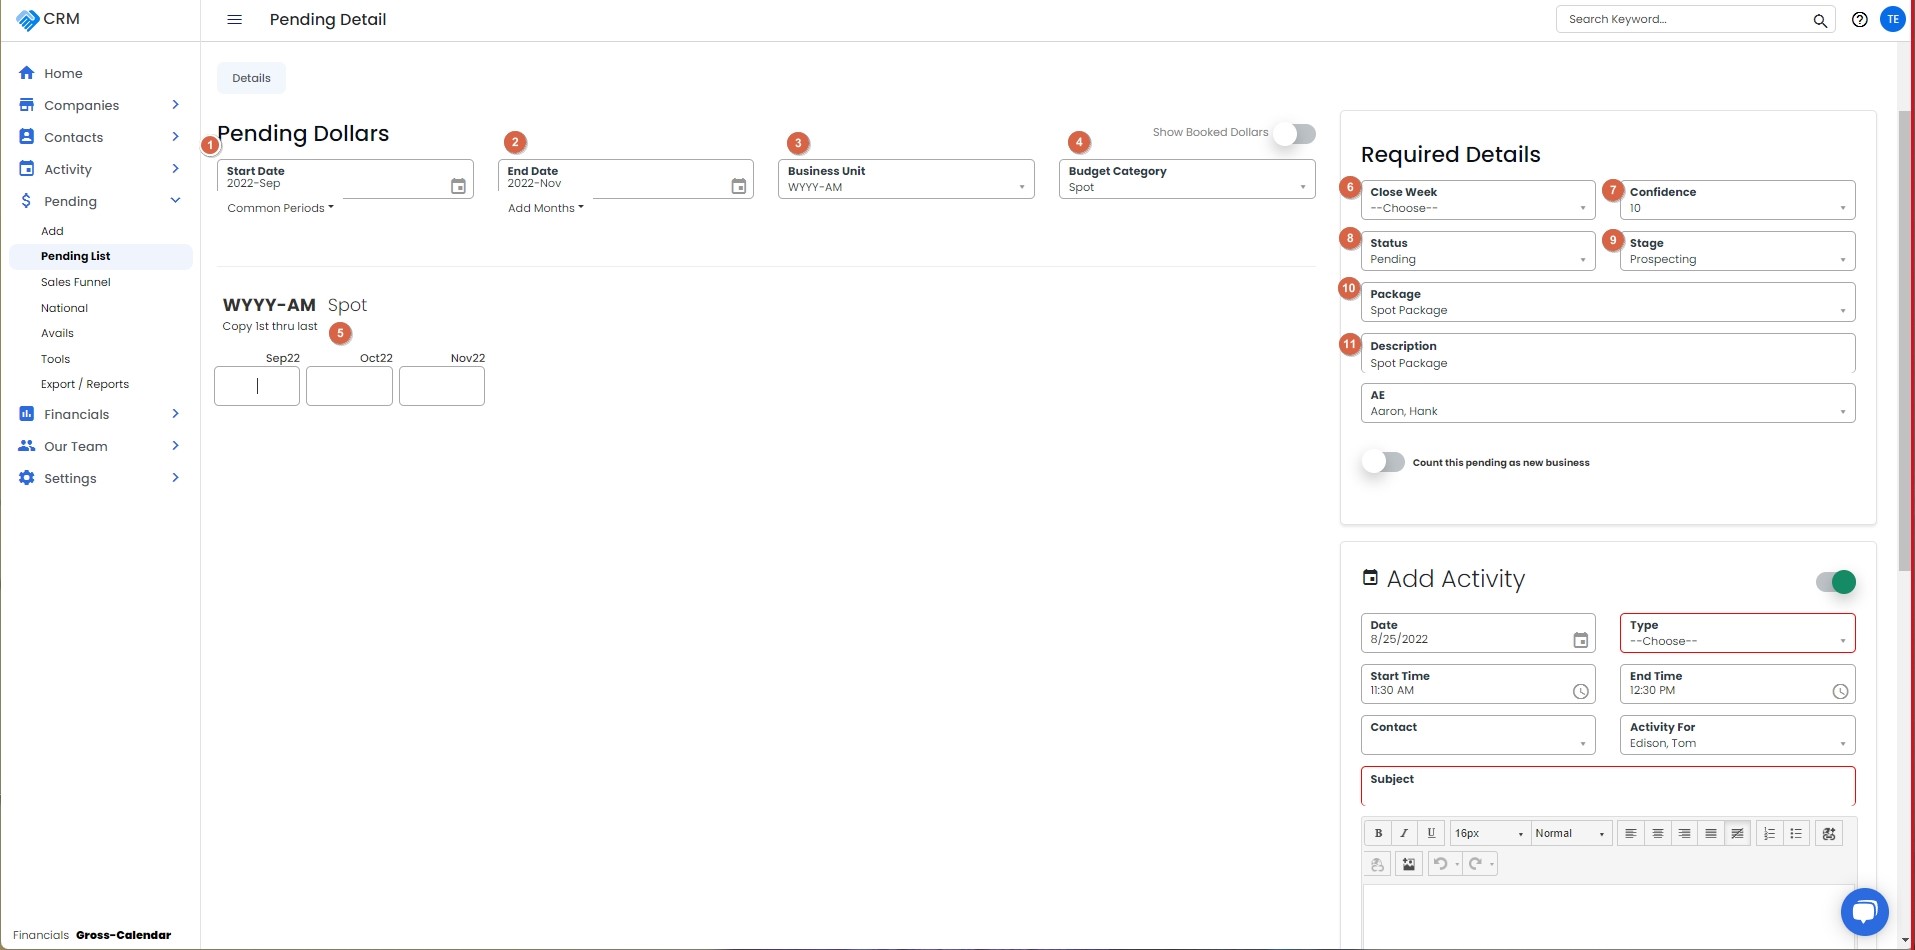
Adding Pending Details:
Enter the information as explained below for each of the fields. You may have fewer fields as your ShareBuilder CRM is customized for your business units and market. Be sure to make a choice in all boxes required.
You may choose more than one business unit if available to you, and more than one budget category.
If you don't own the account on a particular business unit, and if account is available for you to request on other Business units, the Request for Additional Business Units link can be used to request the account. Once the account is requested, you can continue to add pending for all the selected business units.
1. Start Month: If you need to change the start month, click in the drop to change the start month.
2. End Month: Use this to determine how many months you want in the pending.
3. Business Unit: All your default business units will be included here; you have the option to use the drop down and choose specific business unit if you own the account on that or those business unit.
4. Budget Category: Use the drop down to choose, one or multiple budget categories.
5. Enter the dollar amount being proposed for each Business unit and each budget category. If you are proposing the same dollar amount each month, copy first through last can be used.
6. % Confidence: Use this dropdown to indicate your level of confidence in closing this business. This can be updated as you move through the sales process.
Close Week: Use the dropdown to choose the week that you intend to close the business and get the order. This can also be updated throughout the sales process.
Status: This will always default to Pending.
7. Close Week: Use the dropdown to choose the week that you intend to close the business and get the order. This can also be updated throughout the sales process.
8. Status: This will always default to Pending.
9. Stage: The stages of the sales funnel are listed in the dropdown, choose the stage that is applicable to the pending at the current time. The stage can be updated throughout the sales process.
10. Package: The sales initiatives/promotions available to you to sell at your business unit may be listed here. This is customized by your Sales Management team. This will allow you to sort your pending's by a particular package or sales initiative. You can choose one that applies from the dropdown or allow to default to spot package if the proposal is primarily for spots/airtime.
11. Description: This will reflect the package that you pick in step 10. It often defaults to Spot Package. You may want to add more description here so you can keep track of your future pending's. Descriptions months, a year, copy title, or product.
If you are not entering an activity. CLICK SAVE. The SAVE button is always at the top of the page.
Adding A Follow-up Activity
Use the next section to Enter your Next step activities associated with this pending. This tool will help you stay organized and move the business through the sales funnel.
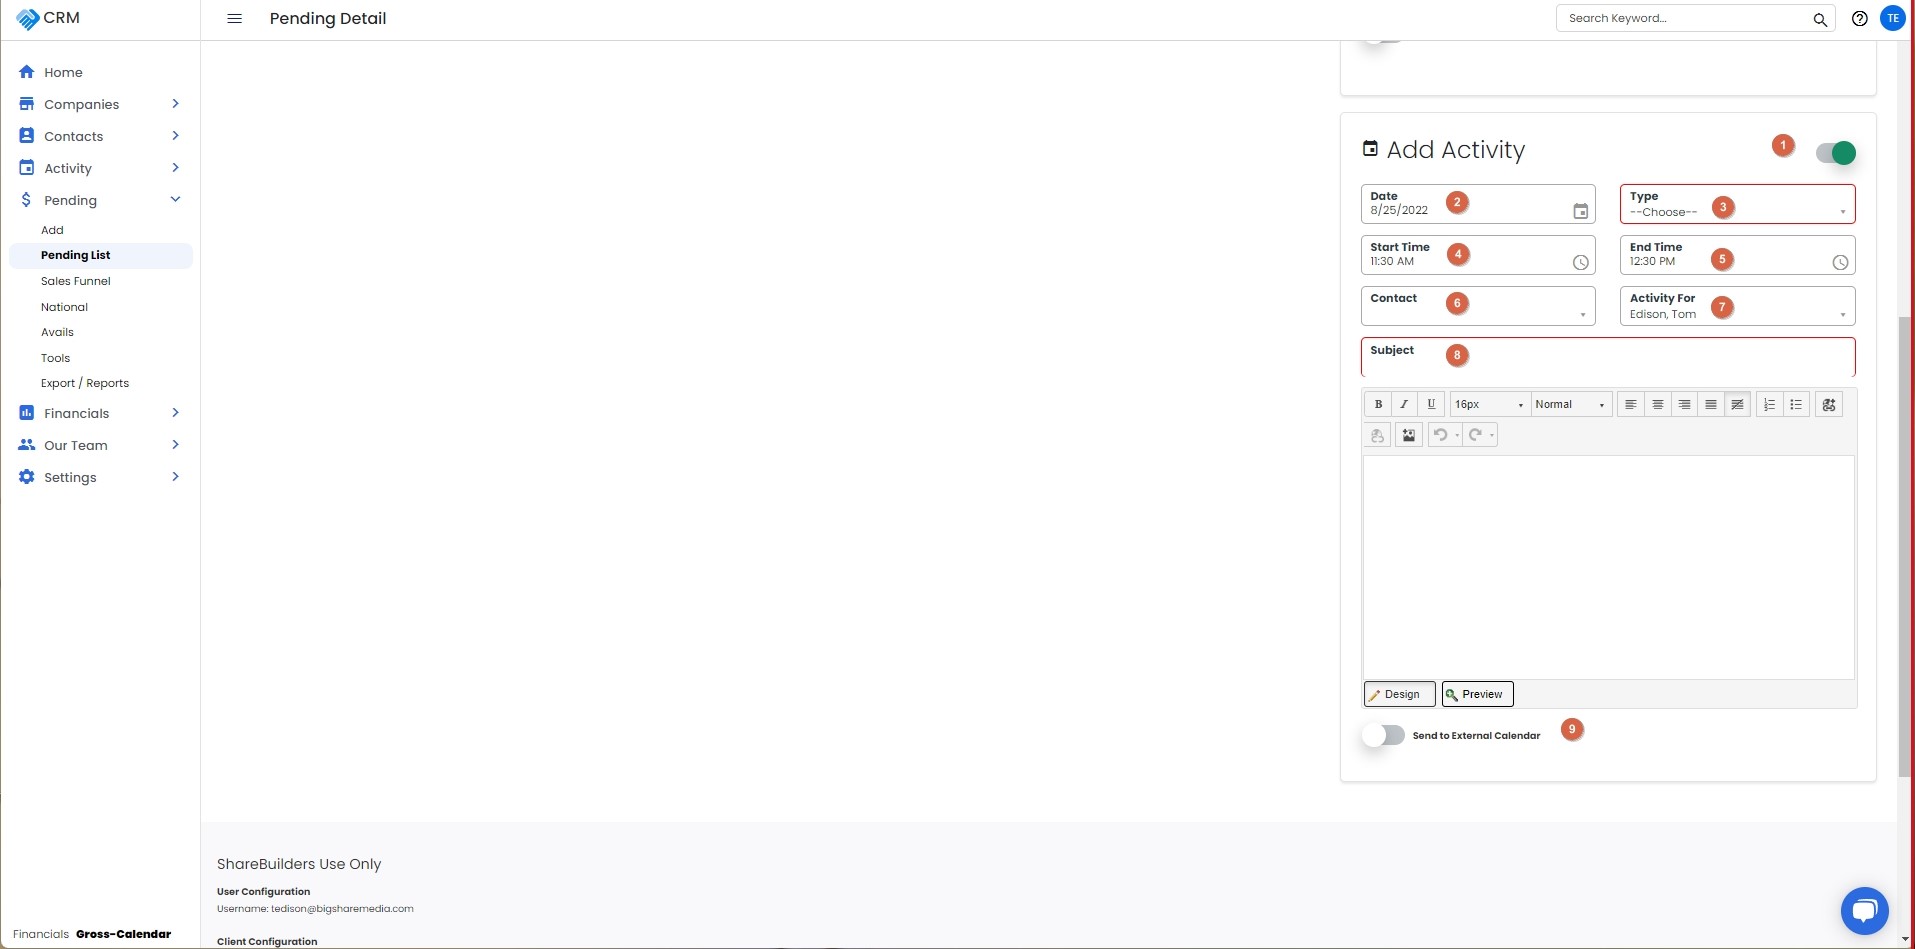
If you don't see the fields in this section, slide this slider to make it green.
-
Date and Start Time and End Time will always default to current, adjusted as needed.
-
Choose the contact for this account. This is optional.
-
Choose Activity Type from the dropdown. Phone, emails, meeting may be some of the available choices, and your Sales Management team may have customized choices. THIS IS A REQUIRED FIELD
-
Purpose: Enter details about the activity. You can copy an email and add as much or as little detail as you wish, as this will stay with the account, and you may want to refer to it in the future. THIS IS A REQUIRED FIELD
-
If you use a calendar other than the ShareBuilder CRM Calendar, you can choose this option to automatically send this activity to your external calendar.
-
Once finished, choose SAVE. The SAVE Button is always at the top of the screen
You can now see this on the pendings tab and the activity and total dollars for the pending will also be listed on the Account page.