This step-by-step guide covers adding a new account or agency, merging duplicate accounts, and transferring multiple accounts between Sellers in ShareBuilder CRM.
Proper account management in ShareBuilder CRM ensures accurate client assignments, data integrity, and seamless transitions. Transferring accounts assigns the correct Seller for continuity, merging duplicates consolidates fragmented data, and accurately adding accounts keeps client information accessible and organized.
Below will show you how to:
Add an Account
Transfer and Account
Merge Accounts
Delete an Account

Click on the "Add+" in the top right-hand corner and choose "Account" from the drop-down.

Search for the Company:
Enter the company name in the search bar and click Next.
A list will populate if the account already exists.
If the Account Exists:
You can add the account to additional business units if it exists in one but not another.
Click on Add This Account to include it in your selected business unit.
If the account is already present in all business units, you may consider challenging it if necessary.
If the Account Does Not Exist:
Scroll down to the bottom of the page and click on Add New Company.
Enter Account Details:
Ensure the account name is listed exactly as you want it to appear.
Fill in all required fields, which are outlined in red. The request cannot proceed without this information.
Use the Business Unit checkboxes to select all or specific business units as needed.
If assigning an agency to the account, select the appropriate agency from the dropdown menu before adding the account.
Finalize the Addition:
Once all information is entered, click on Add Account at the bottom of the page.
If any required fields are missed, the page will return to the top. Scroll to identify and complete the missing fields.
Transferring Individual Account(s)
Go to Companies - Accounts
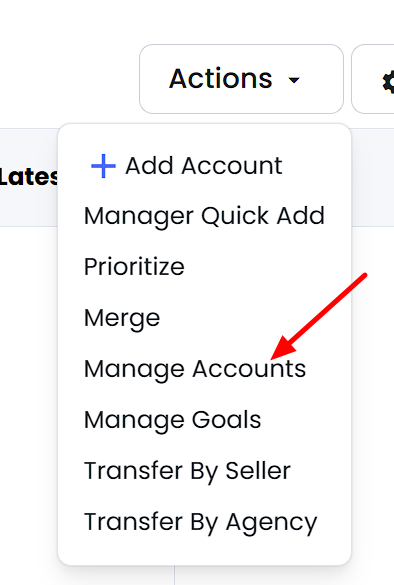
Use the Actions menu to select "Manage Accounts"

This option allows for bulk transfers based on specific criteria.
Use the filters to refine the list by:
Seller’s current account list
Local or National designation
Account Category
Active/Inactive status
Billing Status
Time Frame
After applying the filters, select the Seller to transfer the accounts to.
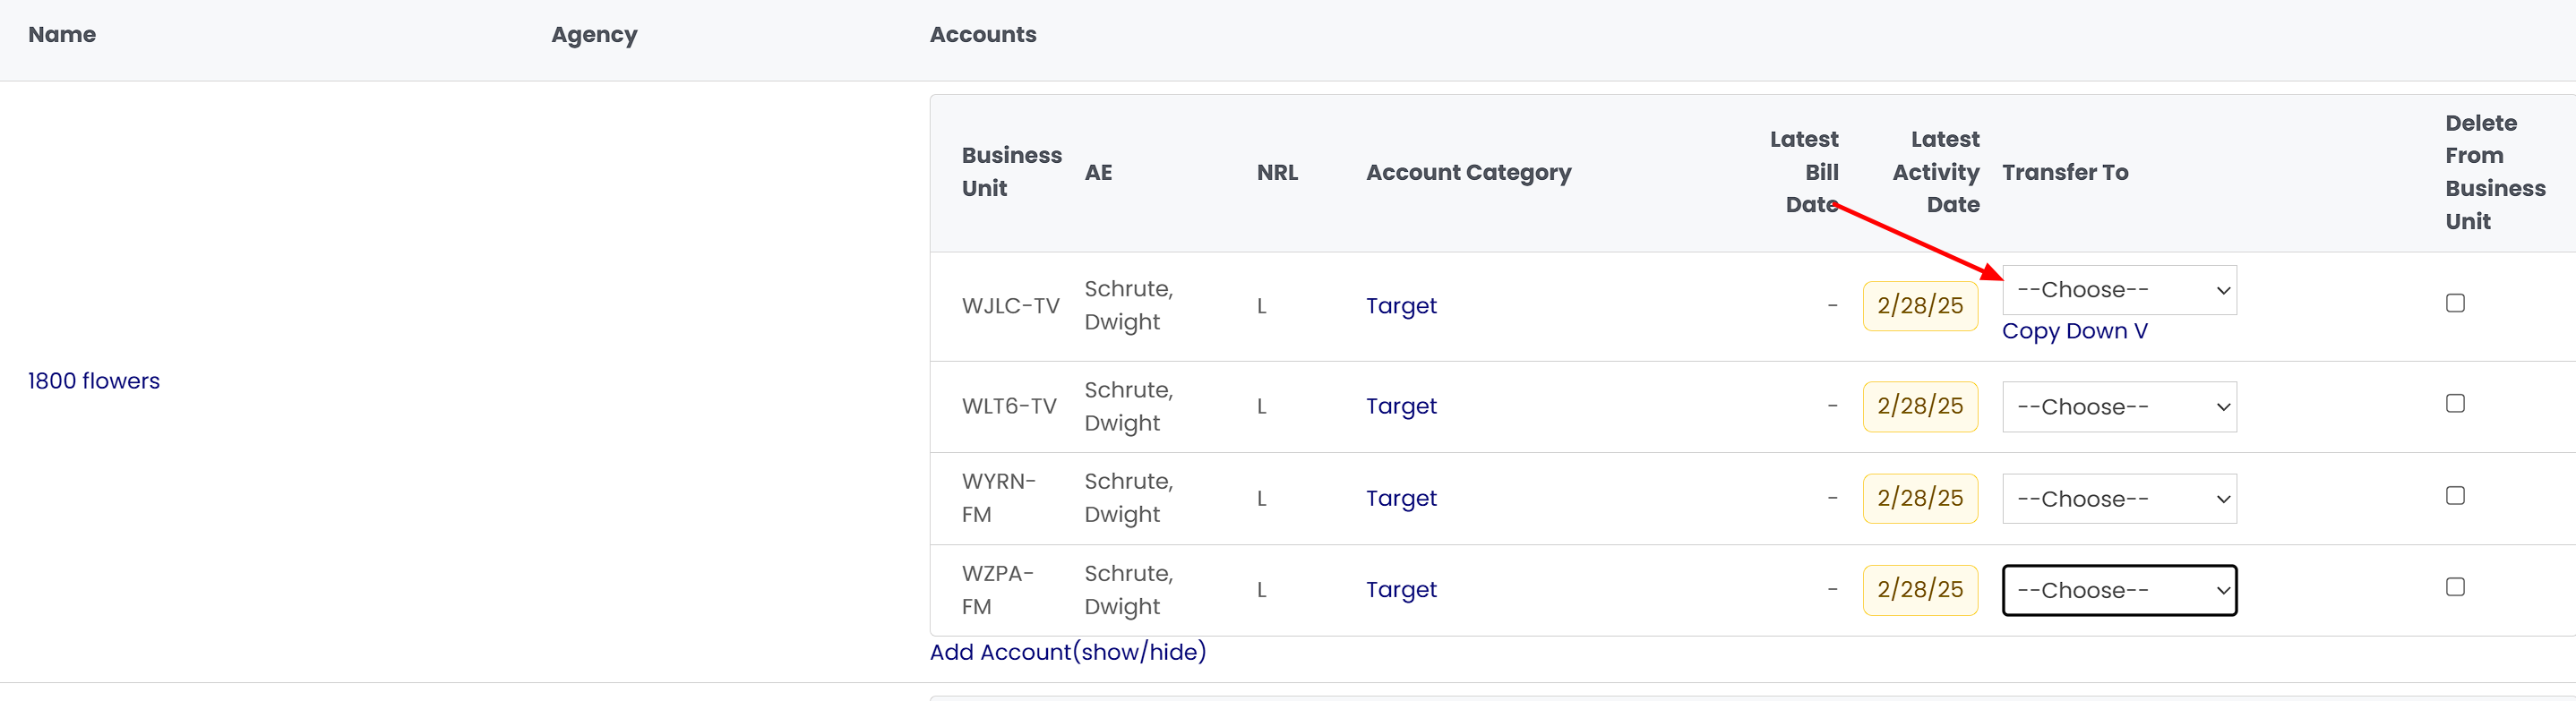
Confirm and save the changes to complete the transfer(s).
If the Seller should handle the account for all listed business units, select Copy Down V to apply the Seller selection across all units.
Multiple Sellers can be assigned at once, depending on the accounts selected.
Transferring an Entire Seller List
This option moves all accounts from one Seller to another!
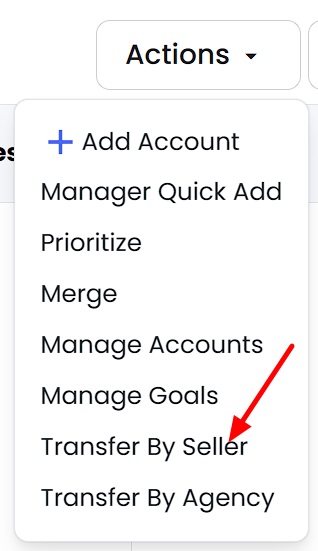
Go to Companies - Accounts.
Use the Actions menu to select "Transfer by Seller"
Select your desired options in the From, Account Types, and To fields.
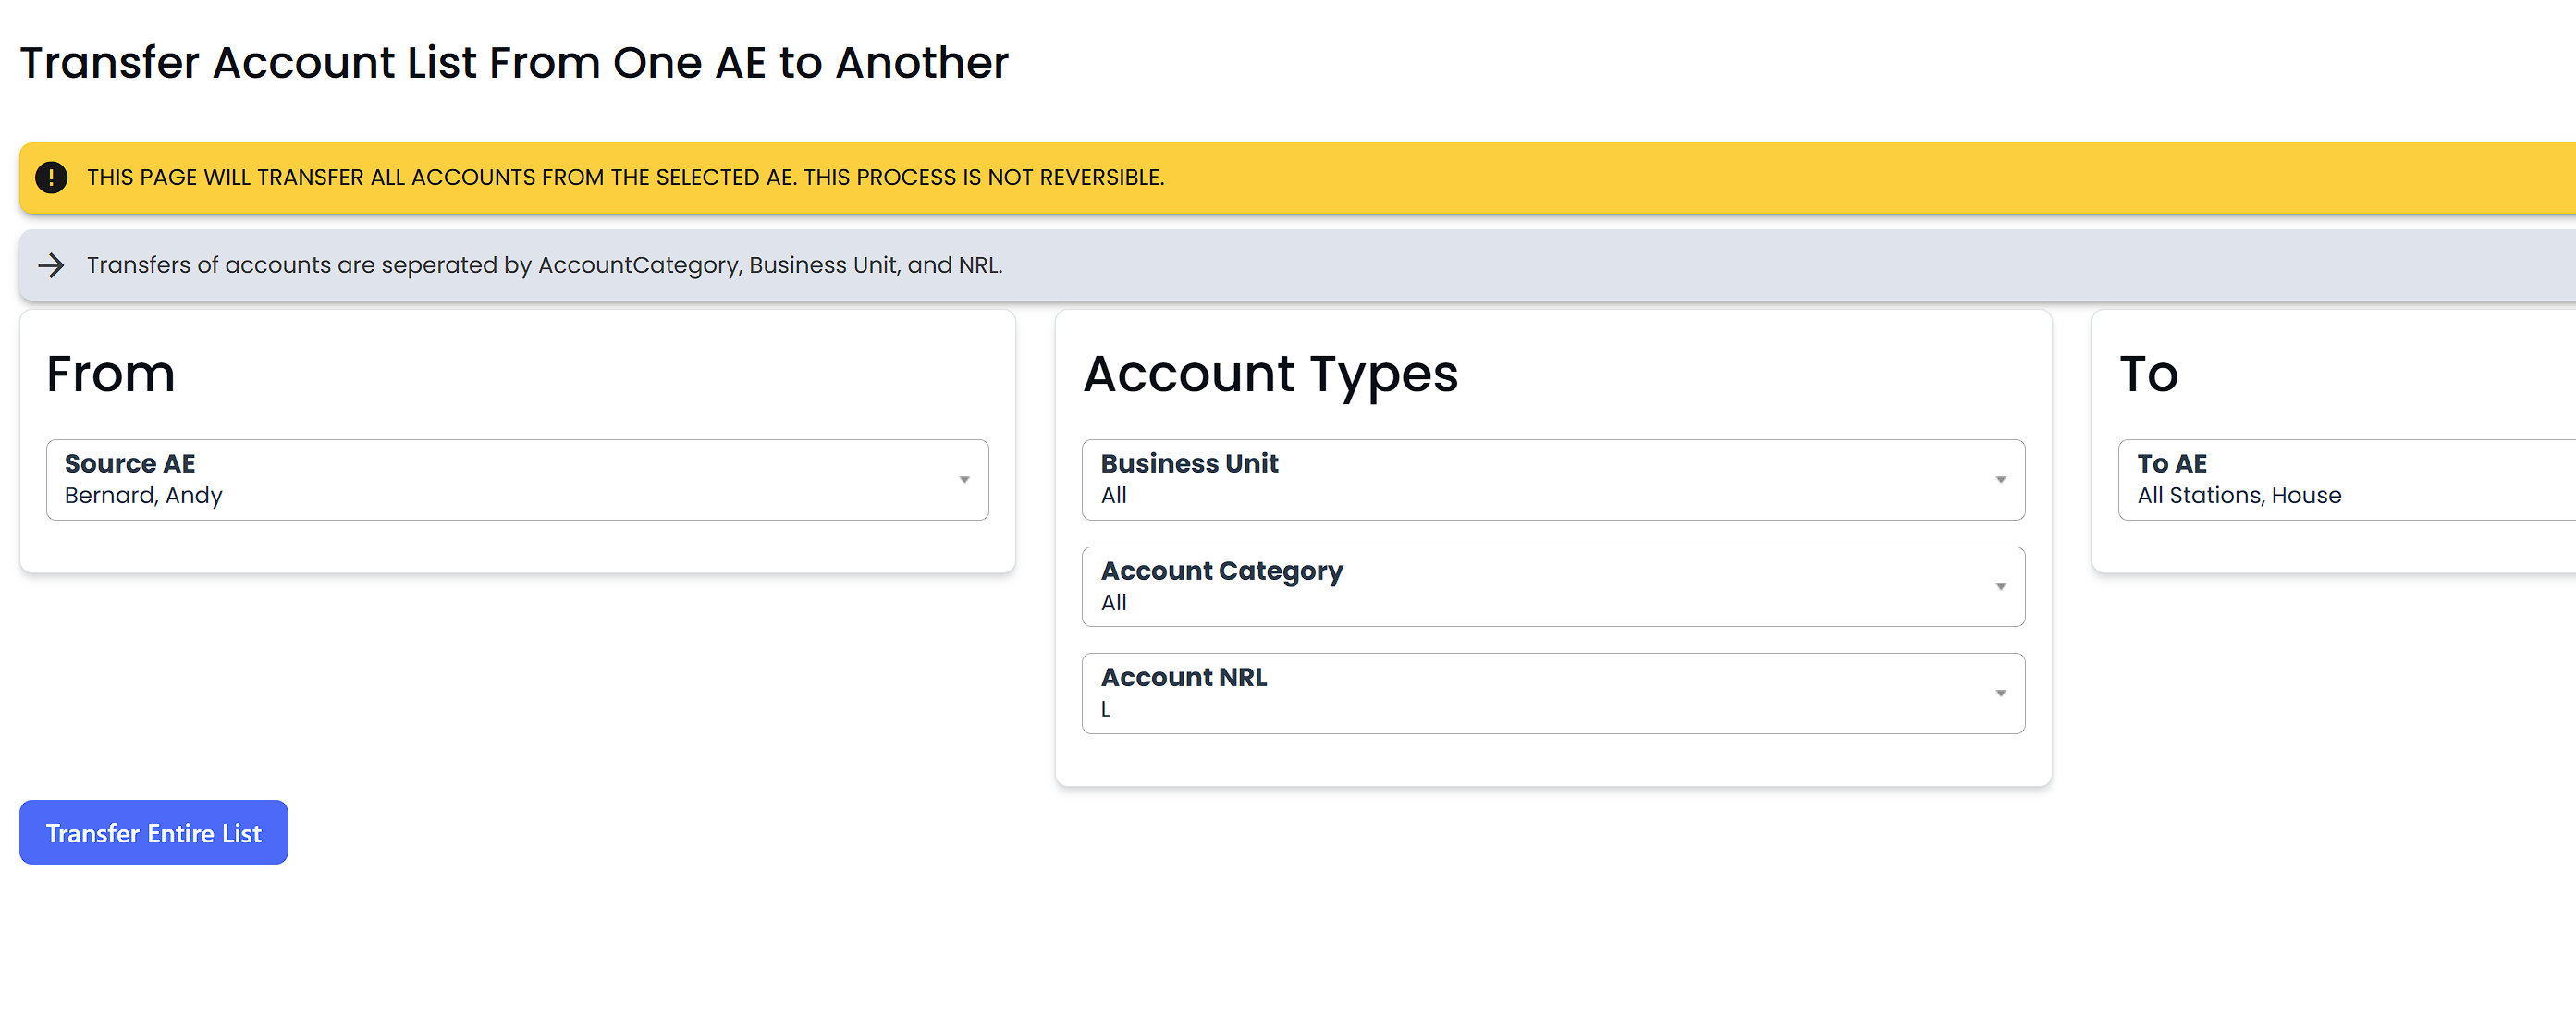
Confirm and save the changes to complete the entire list transfer.
How to Merge Accounts/Agencies
Navigate to the Companies Section
From the Dashboard, click on Companies in the left-hand menu.
Then select Accounts from the dropdown list under Companies.
Access the Merge Tool
On the top-right of the Accounts page, locate the Actions button.
Click on it, and select Merge from the dropdown options.
Choose Your Primary Account
Under Step 1A: Search and Select Accounts, enter the name of the primary account you wish to retain.
Optionally, you can narrow the search by selecting the Seller from the dropdown list.
Click Search.
Select the correct account from the list that appears.
Select the Duplicate to Merge
Under Step 1B: Search and Select Accounts with ALTERNATE Spellings (Optional), enter the duplicate account name.
Click Search, then select the account(s) that should be merged into the primary account.
Compare & Merge
Once both accounts are selected and highlighted in gray, click the Compare Then Merge Accounts button at the bottom of the page.
A pop-up window will display both accounts side-by-side.
Choose Which Records to Keep
For each data field (e.g., Account Name, Agency, Seller, etc.), choose the value you want to retain.
All fields must have a selection to proceed.
Once done, click Merge These Accounts.
What Happens After the Merge?
A confirmation message will appear indicating that the merge was successful.
The selected values will now reflect in the unified account profile.
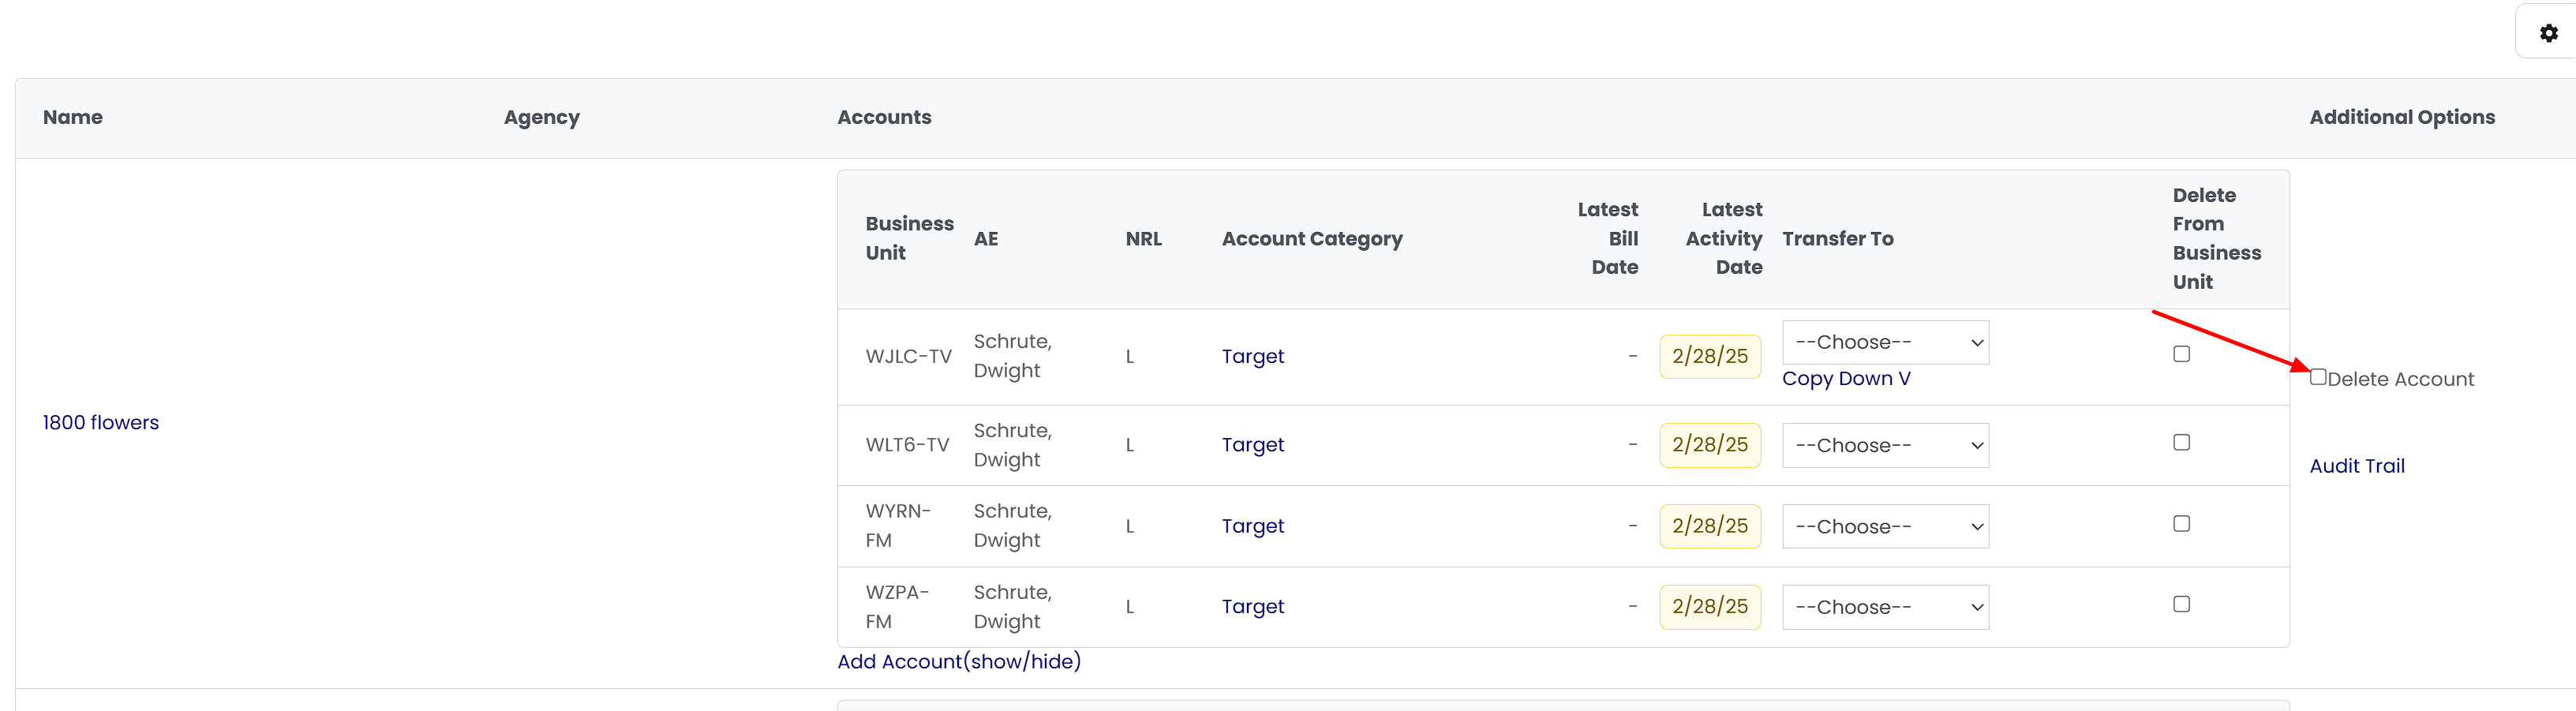
Go to Companies - Accounts
Use the Actions menu to select "Manage Accounts"
If you would like to delete an Account, check the "Delete Account" box on the far right of your screen.